
WebSmith Cloud Exchange will not only sync your email, but also your contacts and calendar events in real time!
Let’s take a look at the following steps below to get you going:
Note: Your iPhone must be an iOS 4.0 or newer, yes a 5, 5c, or 5s is fine too!
Be sure your ordered a WebSmith Cloud Exchange account before proceeding, if not please contact us to get one!
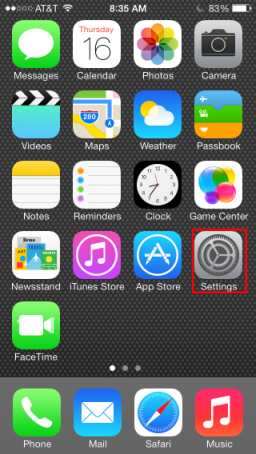
On the main Home screen, tap the Settings icon on your iPhone.
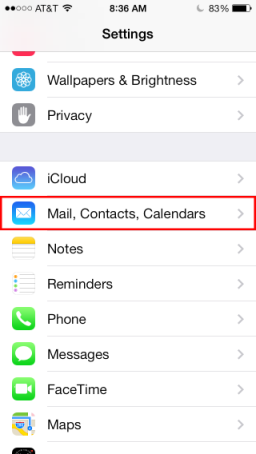
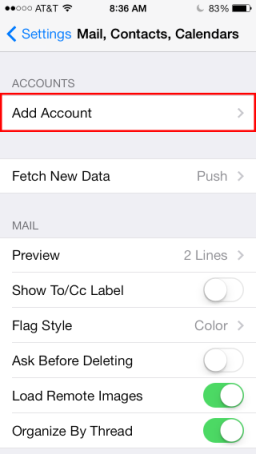
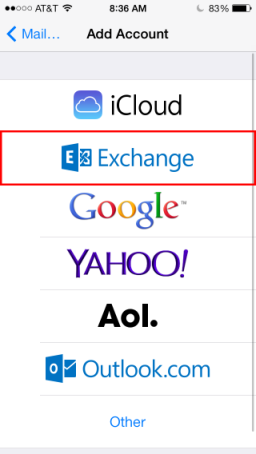
After tapping your Settings icon, you’ll Tap Mail, Contacts, Calendars, Add Account then Microsoft Exchange.
The Exchange setup screen will open; you’ll then enter the following information:
Email – Enter your entire email address (e.g.,
[email protected]), using all lowercase letters.
Domain – Leave this field blank
Username – Enter in your entire email address again.
Password – Enter in the password for your email account.
Description – Enter a descriptive name for your account (e.g., My Work Account). This description will be visible only to you.


Note: the device will attempt to verify the account. You may receive an “Unable to Verify Certificate message,” go ahead and Tap the Accept button.
Next, tap the Server field, and enter mex06.emailsrvr.com in the Server address field. If confirmed, you’ll check marks next to every field.

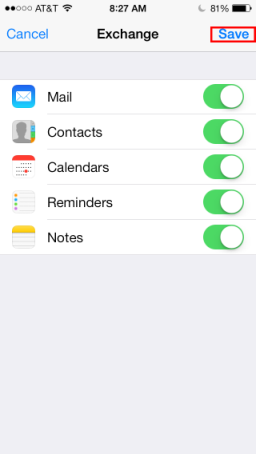
Tap the ON/OFF buttons to select which information you would like to synchronize and then tap the Save button when finished.
Note: Your iPhone may take a moment to sync all your information depending on how much data you have.